2 月 . 14, 2025 14:21 Back to list
how to remove stubborn brake drums
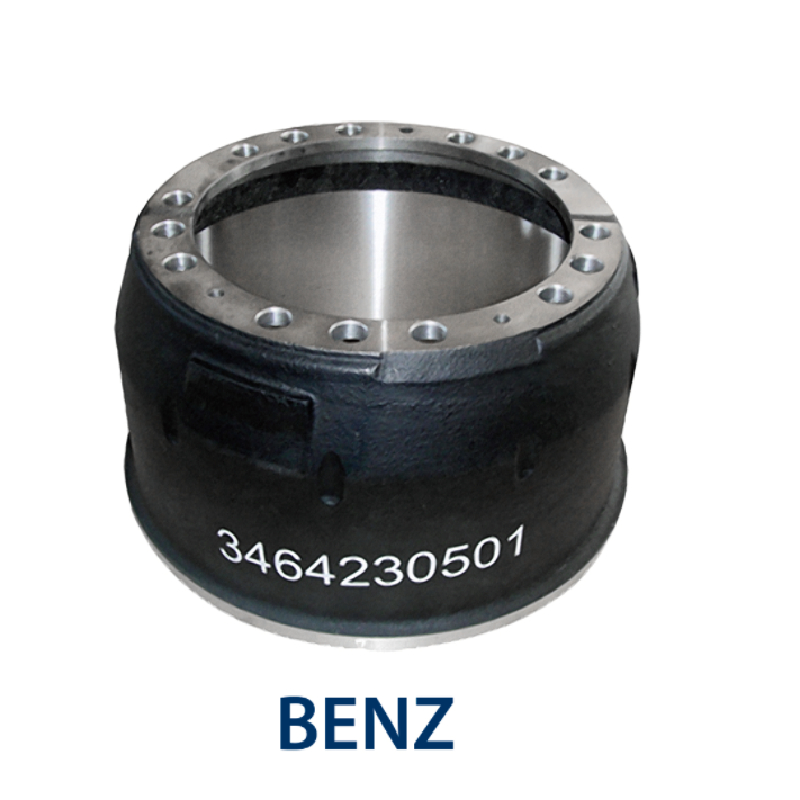
Removing stubborn brake drums can be a challenging task even for seasoned mechanics. A brake drum that refuses to budge can cause frustration and delay, whether you're performing routine maintenance or addressing a specific issue. However, understanding the nuances of this task, armed with the right knowledge and tools, can help in tackling even the most reluctant brake drums with confidence.
If manual persuasion with a mallet isn't successful, consider employing a brake drum puller. This specialized tool uses a trio of arms evenly deployed around the drum's circumference, attached to a central screw device. By turning the screw, uniform pressure is applied, making the removal process more manageable and reducing the risk of damage. In situations where the brake shoes are the culprits holding the drum, proceed to adjust the brake adjuster through the backing plate. This might necessitate rotating the adjuster wheel on the rear of the drum with a brake adjuster spoon or a flathead screwdriver to retract the shoes. This can sometimes be accomplished without fully removing the drum, resolving the issue efficiently. Once the drum finally breaks free, take the opportunity to inspect it thoroughly. Examine the drum for signs of excessive wear or damage, and check the condition of the brake shoes. Any signs of wear or damage might indicate the need for replacements. Reassemble the components, ensuring all parts are adequately cleaned and lubricated, particularly where metal parts meet. Securely fasten all nuts and bolts according to the manufacturer's specifications, ensuring the reassembled brake functions correctly. Understanding this process stems from knowledge grounded in automotive principles and practical experience. With every successful removal, the intricacies of dealing with brake drums become more familiar. It's a testament to the blend of expertise, skill, and the right equipment. Safety remains paramount throughout this entire process. Beyond the fulfillment that comes with mastering this task, there lies the reassurance that all components function as they should, maintaining the safety and performance of your vehicle consistently over time.


If manual persuasion with a mallet isn't successful, consider employing a brake drum puller. This specialized tool uses a trio of arms evenly deployed around the drum's circumference, attached to a central screw device. By turning the screw, uniform pressure is applied, making the removal process more manageable and reducing the risk of damage. In situations where the brake shoes are the culprits holding the drum, proceed to adjust the brake adjuster through the backing plate. This might necessitate rotating the adjuster wheel on the rear of the drum with a brake adjuster spoon or a flathead screwdriver to retract the shoes. This can sometimes be accomplished without fully removing the drum, resolving the issue efficiently. Once the drum finally breaks free, take the opportunity to inspect it thoroughly. Examine the drum for signs of excessive wear or damage, and check the condition of the brake shoes. Any signs of wear or damage might indicate the need for replacements. Reassemble the components, ensuring all parts are adequately cleaned and lubricated, particularly where metal parts meet. Securely fasten all nuts and bolts according to the manufacturer's specifications, ensuring the reassembled brake functions correctly. Understanding this process stems from knowledge grounded in automotive principles and practical experience. With every successful removal, the intricacies of dealing with brake drums become more familiar. It's a testament to the blend of expertise, skill, and the right equipment. Safety remains paramount throughout this entire process. Beyond the fulfillment that comes with mastering this task, there lies the reassurance that all components function as they should, maintaining the safety and performance of your vehicle consistently over time.
Latest news
-
Brake Drum for Kamaz Trucks Durable OEM Replacement & High Performance
NewsMay.30,2025
-
Brake Drum Man High-Quality Drum Brake & Shoe Solutions
NewsMay.30,2025
-
High-Performance Brake Drum for Kamaz Trucks Durable Drum Brake Components
NewsMay.29,2025
-
Brake Drum Man High-Quality Drum Brake Drums & Brake Shoes
NewsMay.29,2025
-
Brake Drum MAZ High-Performance & Durable Replacement Parts
NewsMay.29,2025
-
heavy truck brake drums
NewsMar.07,2025
