
2 月 . 18, 2025 06:32 Back to list
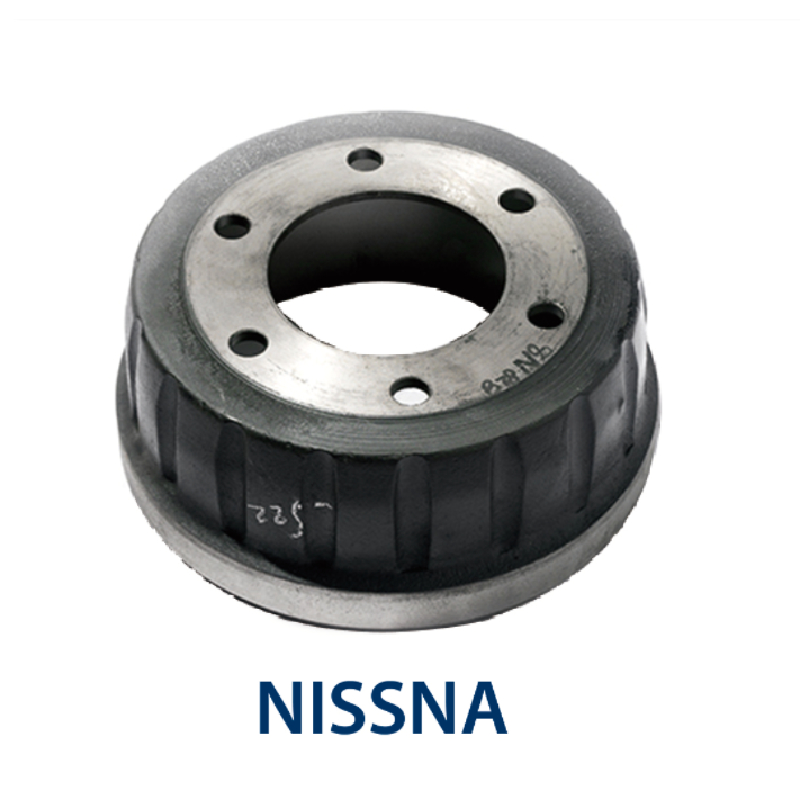
nissan versa drum brake replacement
Replacing the drum brakes on a Nissan Versa requires a blend of technical knowledge and practical experience. This guide is tailored for car enthusiasts and those willing to learn about maintaining their vehicle efficiently. By focusing on expertise and reliability, this article will enhance understanding and confidence in handling brake replacement tasks.
2. Removing the Wheel and Drum Use a wrench to remove the wheel nuts and slide off the wheel. If the drum is stuck, gently tapping it with a rubber mallet can dislodge it. 3. Inspecting Brake Components Once the drum is removed, inspect the brake components. Look for worn-out brake shoes, leaking wheel cylinders, or broken springs. This will determine whether a simple cleaning or a full replacement is necessary. 4. Replacing the Brake Shoes and Springs Remove the old brake shoes by unhooking the springs with pliers. Carefully install the new brake shoes, ensuring they are fitted securely. Reattach the springs and any other hardware following the original placement to maintain correct alignment. 5. Reinstalling the Drum and Wheel Place the drum back over the new brake assembly, ensuring it rotates smoothly. Reattach the wheel and tighten the nuts properly to secure it. 6. Testing After reassembly, test the brakes in a safe controlled environment. The pedal should feel firm, and braking should be smooth without noise. Building Trust with Proper Maintenance Once replaced, maintaining drum brakes is crucial. Regularly inspect brake components every 10,000 miles and clean the brake assembly annually to ensure they remain in optimal condition. Keeping the brake system free of debris and regularly adjusting the brakes will extend their lifespan. Concluding Thoughts Replacing drum brakes may seem daunting, but with the right tools and a meticulous approach, it can be accomplished efficiently. Strive for precision and safety at every step. Rely on trusted resources and don't hesitate to consult professionals if uncertainties arise. Maintaining your Nissan Versa's brakes not only enhances performance but ensures safety and reliability on the road.
2. Removing the Wheel and Drum Use a wrench to remove the wheel nuts and slide off the wheel. If the drum is stuck, gently tapping it with a rubber mallet can dislodge it. 3. Inspecting Brake Components Once the drum is removed, inspect the brake components. Look for worn-out brake shoes, leaking wheel cylinders, or broken springs. This will determine whether a simple cleaning or a full replacement is necessary. 4. Replacing the Brake Shoes and Springs Remove the old brake shoes by unhooking the springs with pliers. Carefully install the new brake shoes, ensuring they are fitted securely. Reattach the springs and any other hardware following the original placement to maintain correct alignment. 5. Reinstalling the Drum and Wheel Place the drum back over the new brake assembly, ensuring it rotates smoothly. Reattach the wheel and tighten the nuts properly to secure it. 6. Testing After reassembly, test the brakes in a safe controlled environment. The pedal should feel firm, and braking should be smooth without noise. Building Trust with Proper Maintenance Once replaced, maintaining drum brakes is crucial. Regularly inspect brake components every 10,000 miles and clean the brake assembly annually to ensure they remain in optimal condition. Keeping the brake system free of debris and regularly adjusting the brakes will extend their lifespan. Concluding Thoughts Replacing drum brakes may seem daunting, but with the right tools and a meticulous approach, it can be accomplished efficiently. Strive for precision and safety at every step. Rely on trusted resources and don't hesitate to consult professionals if uncertainties arise. Maintaining your Nissan Versa's brakes not only enhances performance but ensures safety and reliability on the road.
Latest news
-
Brake Drum for Kamaz Trucks Durable OEM Replacement & High Performance
NewsMay.30,2025
-
Brake Drum Man High-Quality Drum Brake & Shoe Solutions
NewsMay.30,2025
-
High-Performance Brake Drum for Kamaz Trucks Durable Drum Brake Components
NewsMay.29,2025
-
Brake Drum Man High-Quality Drum Brake Drums & Brake Shoes
NewsMay.29,2025
-
Brake Drum MAZ High-Performance & Durable Replacement Parts
NewsMay.29,2025
-
heavy truck brake drums
NewsMar.07,2025